In part two of this series, Allison and I share detailed instructions from a former clubmate (who prefers to remain anonymous). It is actually her "extreme armoring" that sent us down this rabbit hole. Below are detailed instructions, and photographs, of anon's modding technique.
- The easiest jackets to sew onto are the lightest of LP and Allstarr Startex. The harder, thicker ones are Negrini and PBT to get the needle through. I use quilting needles.
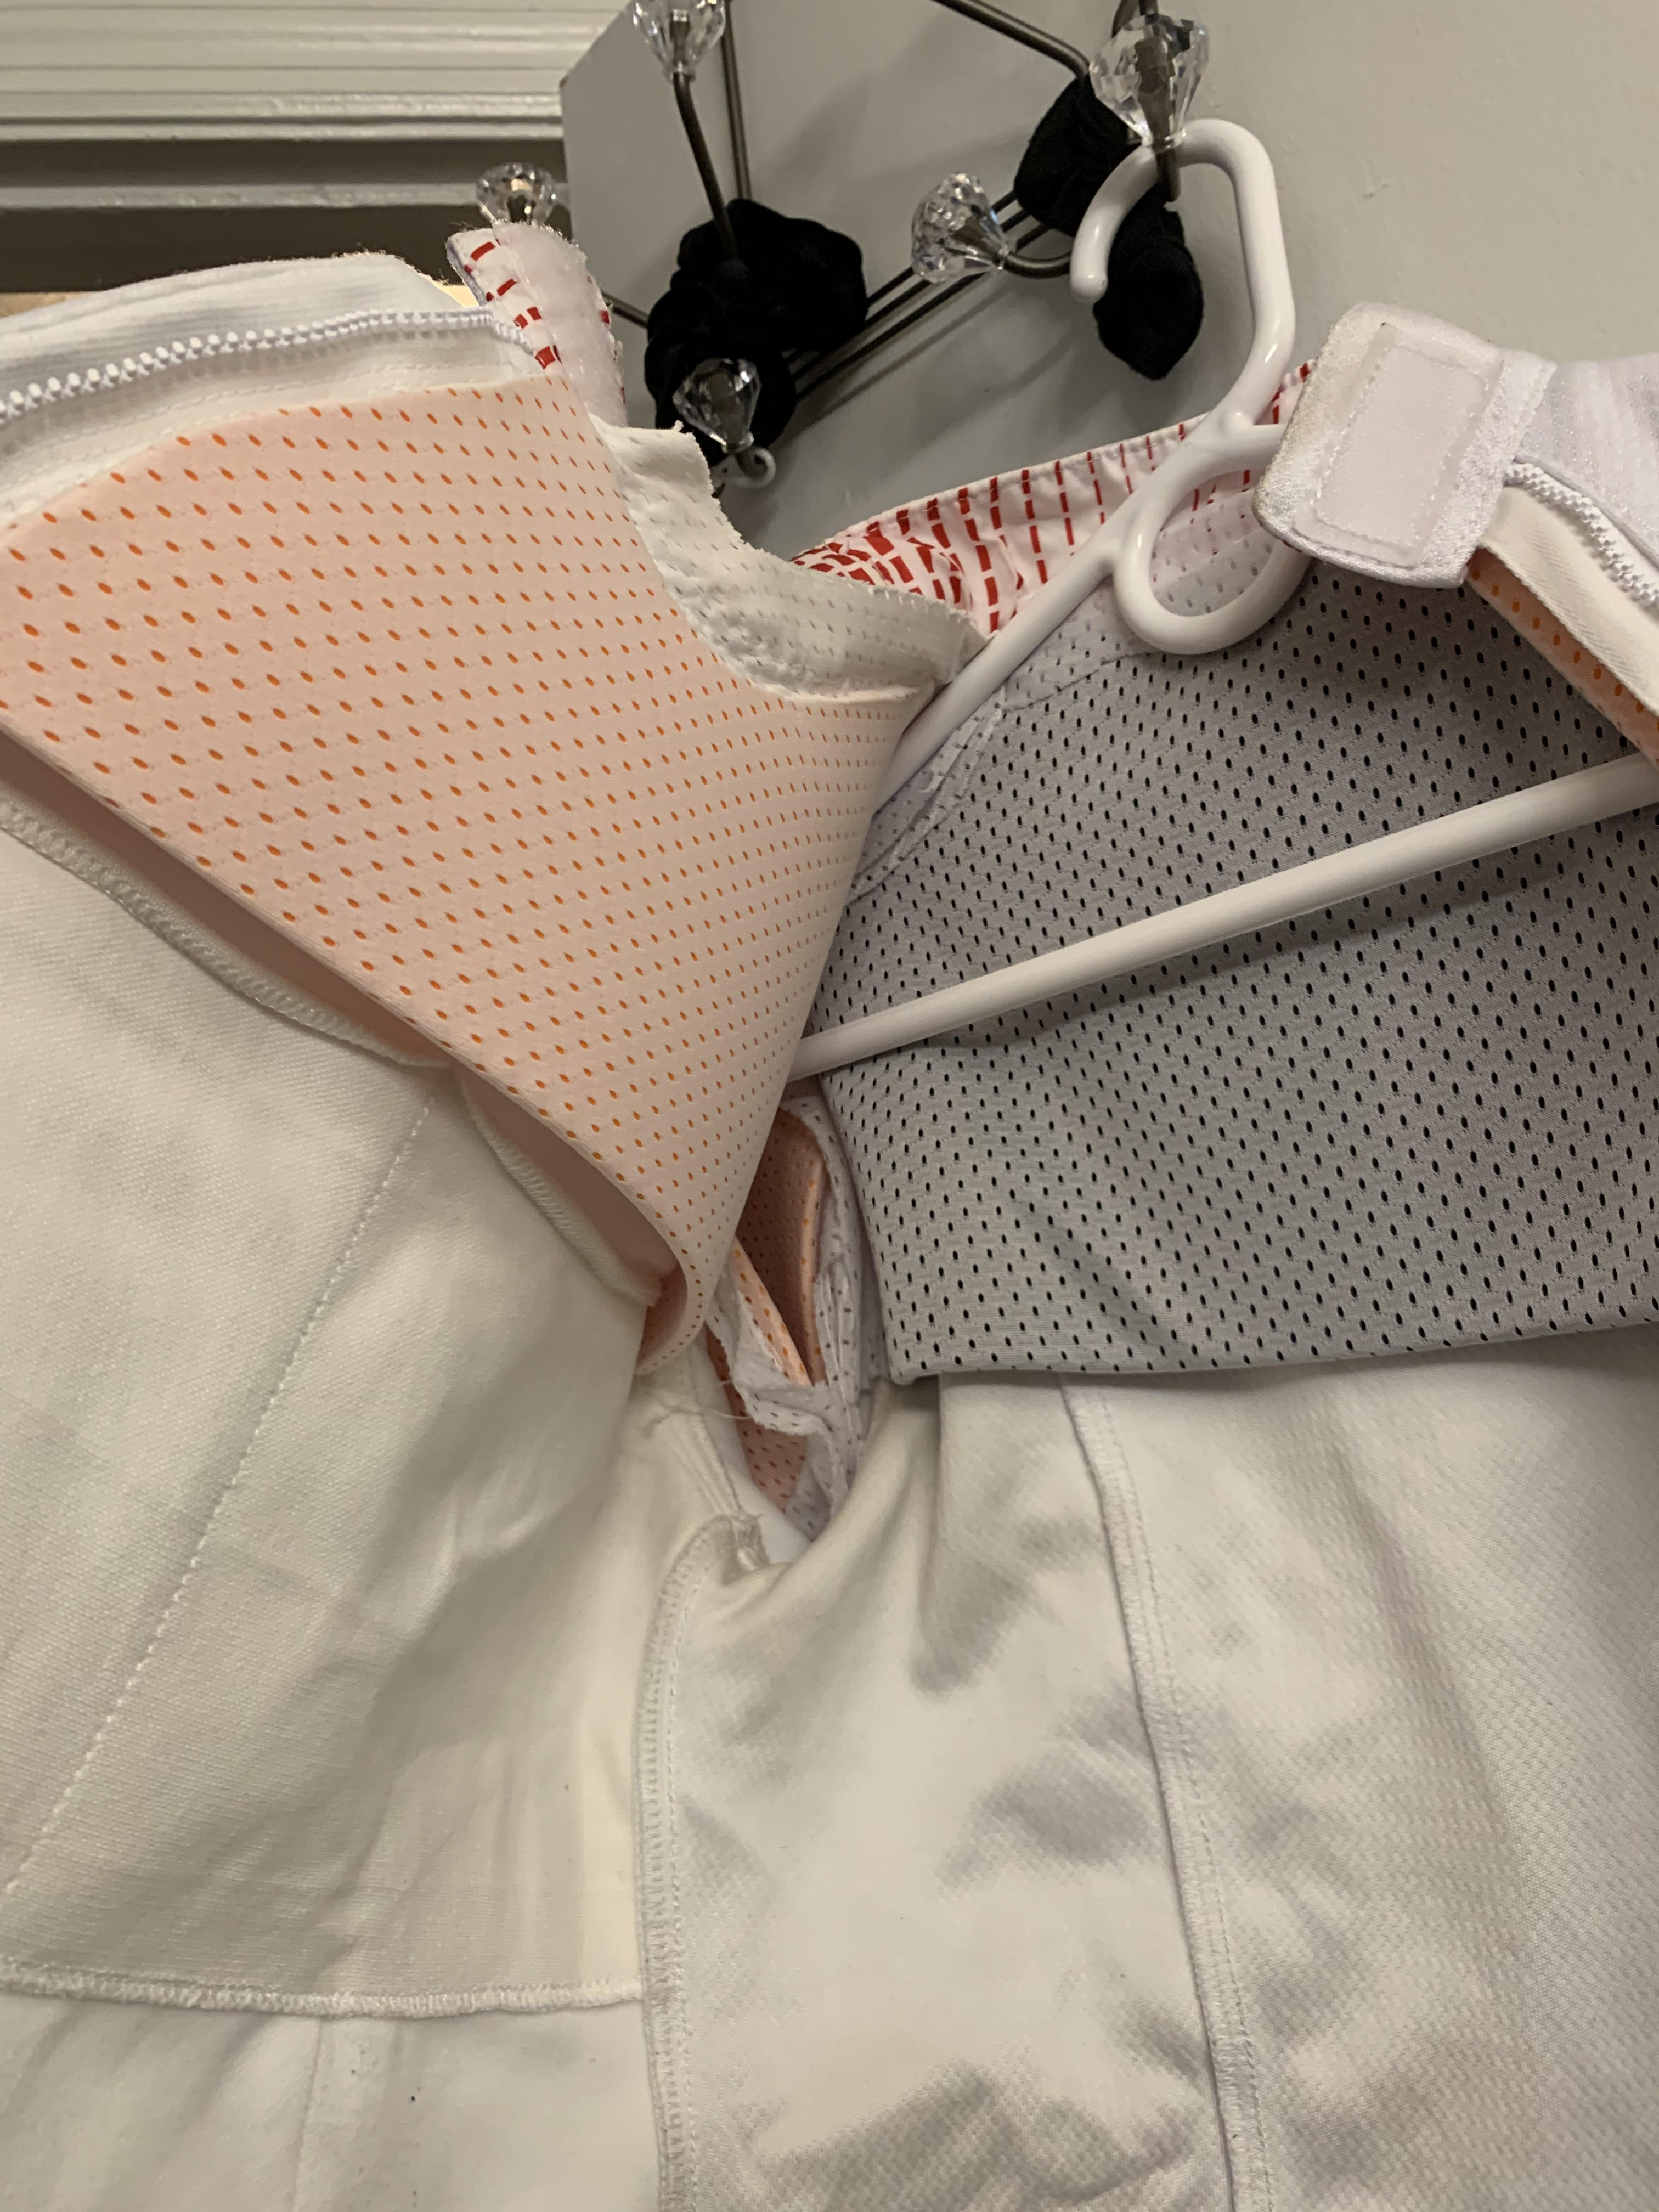
- I make an accurate pattern using the jacket onto sewing pattern paper, cut out neoprene of the desired thickness using the pattern, wrap white athletic mesh around the neoprene, sew the mesh onto the neoprene and sew the mesh onto the jacket. Don't use anything other than athletic mesh because they will break or absorb sweat to increase weight. Cotton or silk do not work well. Get a yard or two of the white mesh online or at a local sewing store.
- The best way to get neoprene is to buy waist protectors/ lifting belts and sweat belts at sports stores or Amazon. They differ by thickness and McDavid works for me. Look for the ones that don't have material or hardware on them. Cut off the piece that has the rough velcro.
- I've tried other materials than neoprene, including the expensive shin protector materials that LP sells but nothing is better than neoprene.
- Of course, you could use a sewing machine for the chest/ shoulder, but the arms require hand stitching. I know because I took it to a fencing mom who's a professional seamstress once and it cost over $375 for all the hand sewing so I sew it myself now and it looks almost professional.
- A well sewn neoprene piece will last as long as the jacket and I've had mine for 10+ years. You'll just need to reinforce where the mesh attaches to the jacket but nothing has ever ripped before.
- I'd recommend putting the work into a new quality jacket because it takes me 30+ hours to sew on all the pieces but if you're aiming to sew on just one or two where the guys are battering you, it'll be an afternoon project.
- For the collarbone and chest above the plastic protector and right bicep where we get hit often, I'd recommend 2 layers of neoprene wrapped into the mesh. For other places I'd recommend only 1 layer to not inhibit your flexibility, especially during infighting.
- I have pieces around the chest/ collarbone, right bicep, inner left bicep, left hand watch/ wrist/ right shoulder for flicks, right thigh and hip bone.
- For my knees and shine, I wear very loose compression braces made of neoprene. A 25 year old guy did a horizontal coupe missing my lame entirely, landing on my shin and breaking it two years ago. My coach got hit so hard on the hip bone every night at practice when he was on the national team his bone died and is permanently numb so definitely worth it to protect whatever parts you wanna keep.
- When you sew, stitch close to the stitch line to minimize thread appearance. Take larger 0.5-1cm stitches on the inside and take tiny, barely visible stitches on the outside. Use safety pins to secure the piece before sewing. After you've sewed a piece onto the jacket or pants where it holds up, try it on in the on guard stance, move a little to make sure the piece covers exactly how much of your body you want to protect.
- Use a synthetic thread, if you have a synthetic jacket. Do not use cotton thread, even if it's very thick because they don't last. I use Coats & Clark eloflex double threaded.
- Last month a blade bounced off my chest protector and broke a bone in my left hand so now I wrap it.
- The guys have given me bone bruises around the ankle that have shown up on x-rays so I put either a piece of neoprene or cut out of a foam shoe insert underneath my socks around the front ankle for their 7 and 8 parries/ searches."


No comments:
Post a Comment